Conventions for Xcode
Learn how to organize your codebase. If you are struggling with Xcode project structure, files, naming conventions, read this.
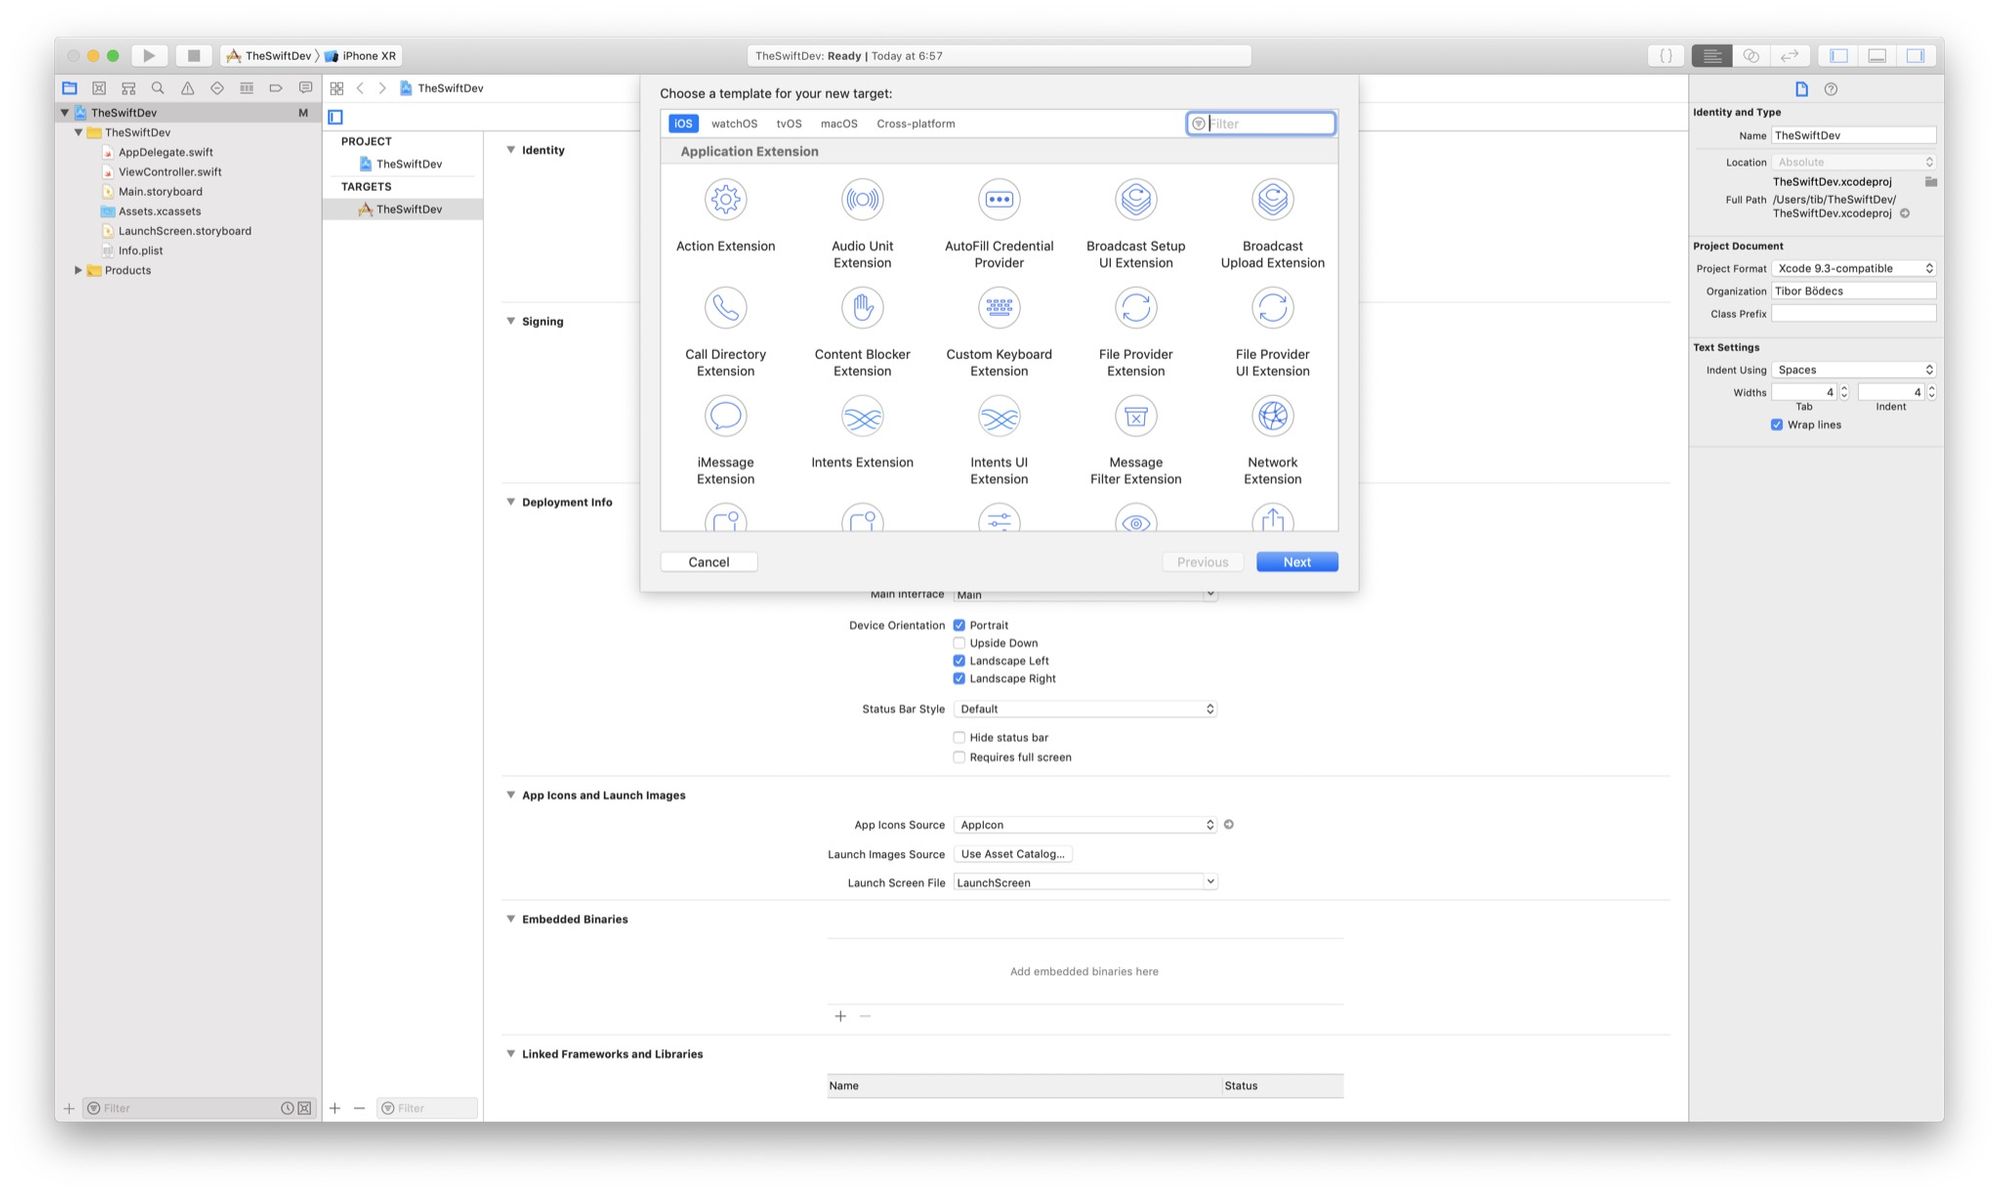
Apple has so much frameworks and APIs that I don’t even know many of them. We are also living in the age of application extensions. If you are trying to create a brand new target in Xcode, you might end up scratching your head. 🤔

This is great for both for developers and end-users, but after creating a few targets and platforms (your project grows and) you might ask the question:
How should I organise my codebase?
Don’t worry too much about it, I might have the right answer for you! 😉
The problem with complex projects
You can create apps in Xcode for all the major operating systems: iOS, macOS, tvOS, watchOS. In the latest version of Xcode you can also add more than 20 extension just for iOS, plus there are lots of app extensions available for macOS as well. Imagine a complex application with multiple extensions & targets. This situation can lead to inconsistent bundle identifiers and more ad-hoc naming solutions. Oh, by the way watchOS applications are just a special extensions for iOS targets and don’t forget about your tests, those are individual targets as well! ⚠️
As far as I can see, if you are trying to support multiple platforms you are going to have a lot of targets inside your Xcode project, additionally every new target will contain some kind of source files and assets. Should I mention schemes too? 😂
Even Apple removed it’s Lister sample code, that demonstrated one of a hellish Xcode project with 14 targets, 11 schemes, but the overall project contained only 71 Swift source files. That’s not too much code, but you can see the issue here, right?
It’s time to learn how to organise your project! 💡
Xcode project organization
So my basic idea is to have a reasonable naming conceptand folder structure inside the project. This involves targets, schemes, bundle identifiers, location of source files and assets on the disk. Let’s start with a simple example that contains multiple targets to have a better understanding. 🤓
If you are using the Swift Package Manager eg. for Swift backends, SPM will generate your Xcode project files for you, so you shoudn’t care too much about conventions and namings at all. 🤷♂️
Project name
Are you creating a new application? Feel free to name your project as you want. 😉
Are you going to make a framework? Extend your project name with the Kit suffix. People usually prefer to use the ProjectKit style for libraries so that’s the correct way to go. If you have a killer name, use that instead of the kit style! 😛
Available platforms
Always use the following platform names:
- iOS
- macOS
- watchOS
- tvOS
Target naming convention
Name your targets like:
[platform] [template name]
Don’t include project name in the targets (that would be just a duplicate)
Use the extension names from the new target window (eg. Today Extension)
Use “Application” template name for the main application targets
Use “Framework” as template name for framework targets
Order your targets in a logical way (see the example)
Scheme names
Simply use target names for schemes too (prefix with project name if required).
[project] - [platform] [template name]
You can prefix schemes with your project name if you want, but the generic rule is here to use the exact same name as your target. I also like to separate framework schemes visually from the schems that contain application logic, that’s why I always move them to the top of the list. However a better approach is to separate frameworks into a standalone git repository & connect them through a package manager. 📦
Bundle identifiers
This one is hard because of code signing. You can go with something like this:
[reverse domain].[project].[platform].[template name]
Here are the rules:
- Start with your reverse domain name (com.example)
- After the domain, insert your project name
- Include platform names, except for iOS, I don’t append that one.
- Use the template name as a suffix (like .todayextension)
- Don’t add application as a template name
- Use .watchkitapp, .watchkitextension for legacy watchOS targets
- Don’t use more than 4 dots (see example below)!
If you are going to use
com.example.project.ios.today.extensionthat’s not going to work, because it contains more than 4 dots. So you should simply go withcom.example.project.ios.todayextensionand names like that. 😢
Anyway, just always try to sign your app and submit to the store. Good luck. 🍀
Project folders
The thing is that I always create physical folders on the disk. If you make a group in Xcode, well by default that’s not going to be an actual folder and all your source files and assets will be located under the project’s main directory.
I know it’s a personal preference but I don’t like to call a giant “wasteland” of files as a project. I’ve seen many chaotic projects without proper file organization. 🤐
No matter what, but I always follow this basic pattern:
- Create folders for the targets
- Create a Sources folder for the Swift source files
- Create an Assets folder for everything else (images, etc).
Under the Sources I always make more subfolders for individual VIPER modules, or simply for controllers, models, objects, etc.
Example use case
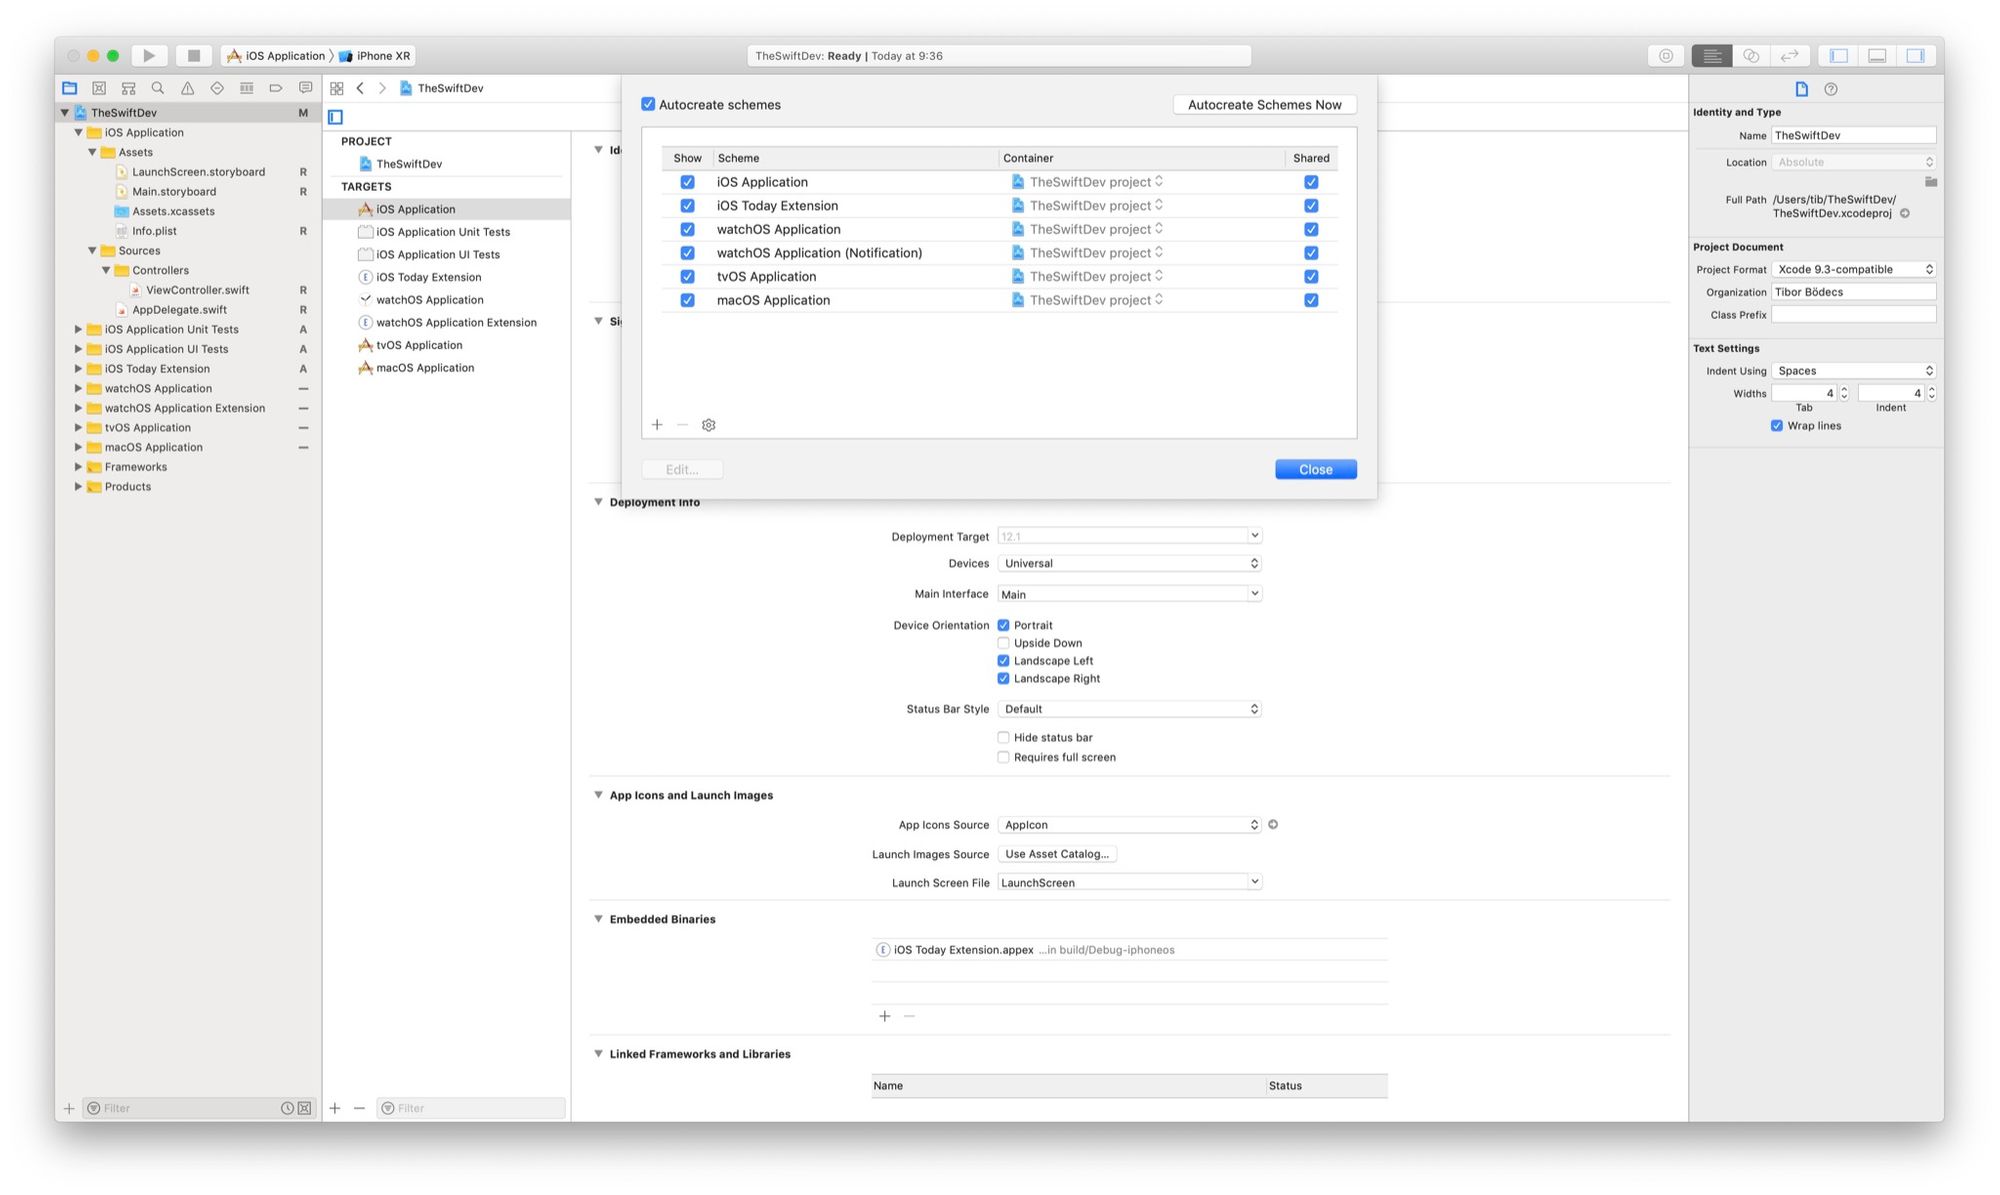
Here is a quick example project in Xcode that uses my conventions.

As you can see I followed the pattern from above. Let’s assume that my project name is TheSwiftDev. Here is a quick overview of the full setup:
Target & scheme names (with bundle identifiers):
- iOS Application (com.tiborbodecs.theswiftdev)
- iOS Application Unit Tests (n/a)
- iOS Application UI Tests (n/a)
- iOS Today Extension (com.tiborbodecs.theswiftdev.todayextension)
- watchOS Application (com.tiborbodecs.theswiftdev.watchos)
- watchOS Application Extension (com.tiborbodecs.theswiftdev.watchos.extension)
- tvOS Application (com.tiborbodecs.theswiftdev.macos)
- macOS Application (com.tiborbodecs.theswiftdev.tvos)
If you rename your iOS target with a WatchKit companion app, be careful!!! You also have to change the
WKCompanionAppBundleIdentifierproperty inside your watch application target’sInfo.plistfile by hand. ⚠️
This method might looks like an overkill at first sight, but trust me it’s worth to follow these conventions. As your app grows, eventually you will face the same issues as I mentioned in the beginning. It’s better to have a plan for the future.
Related posts
Awesome native Xcode extensions
This is the biggest and the best collection of the currently available natively created source editor extensions for Xcode.
Conventions for Xcode
Learn how to organize your codebase. If you are struggling with Xcode project structure, files, naming conventions, read this.
Custom working directory in Xcode
Learn how to set a custom working directory in Xcode to solve one of the most common beginner issue when using Vapor.
How to launch a macOS app at login?
In this tutorial I'll show you how to launch a completely sandboxed macOS application on system startup written in Swift.


